AnimalBuster Part 1 - Create a Slingshot
Overview
You will build an interactive VR shooting game using XRCC in this tutorial. This tutorial demonstrates some more advanced ways to control the game throw using behaviours, especially with the math behaviour blocks and flow control behaviour blocks. If you are new to XRCC, we recommend that you complete tutorials 1 - 4 first before going through this tutorial.
Resources Download
The project used for this tutorial comes in two formats: a starter project for use in this step-by-step tutorial, and a completed project for your reference after you've completed the tutorial.
Project files for the Animal Buster tutorial can be found at:
For this tutorial, the starter project will be used to guide you build the VR game in a step-by-step manner. All the necessary assets required for the tutorial are already included in the project, so just open the starter project in XRCC and you are ready to go with the tutorial.
A complimentary video for this tutorial is available from the below link to assist your learning process:
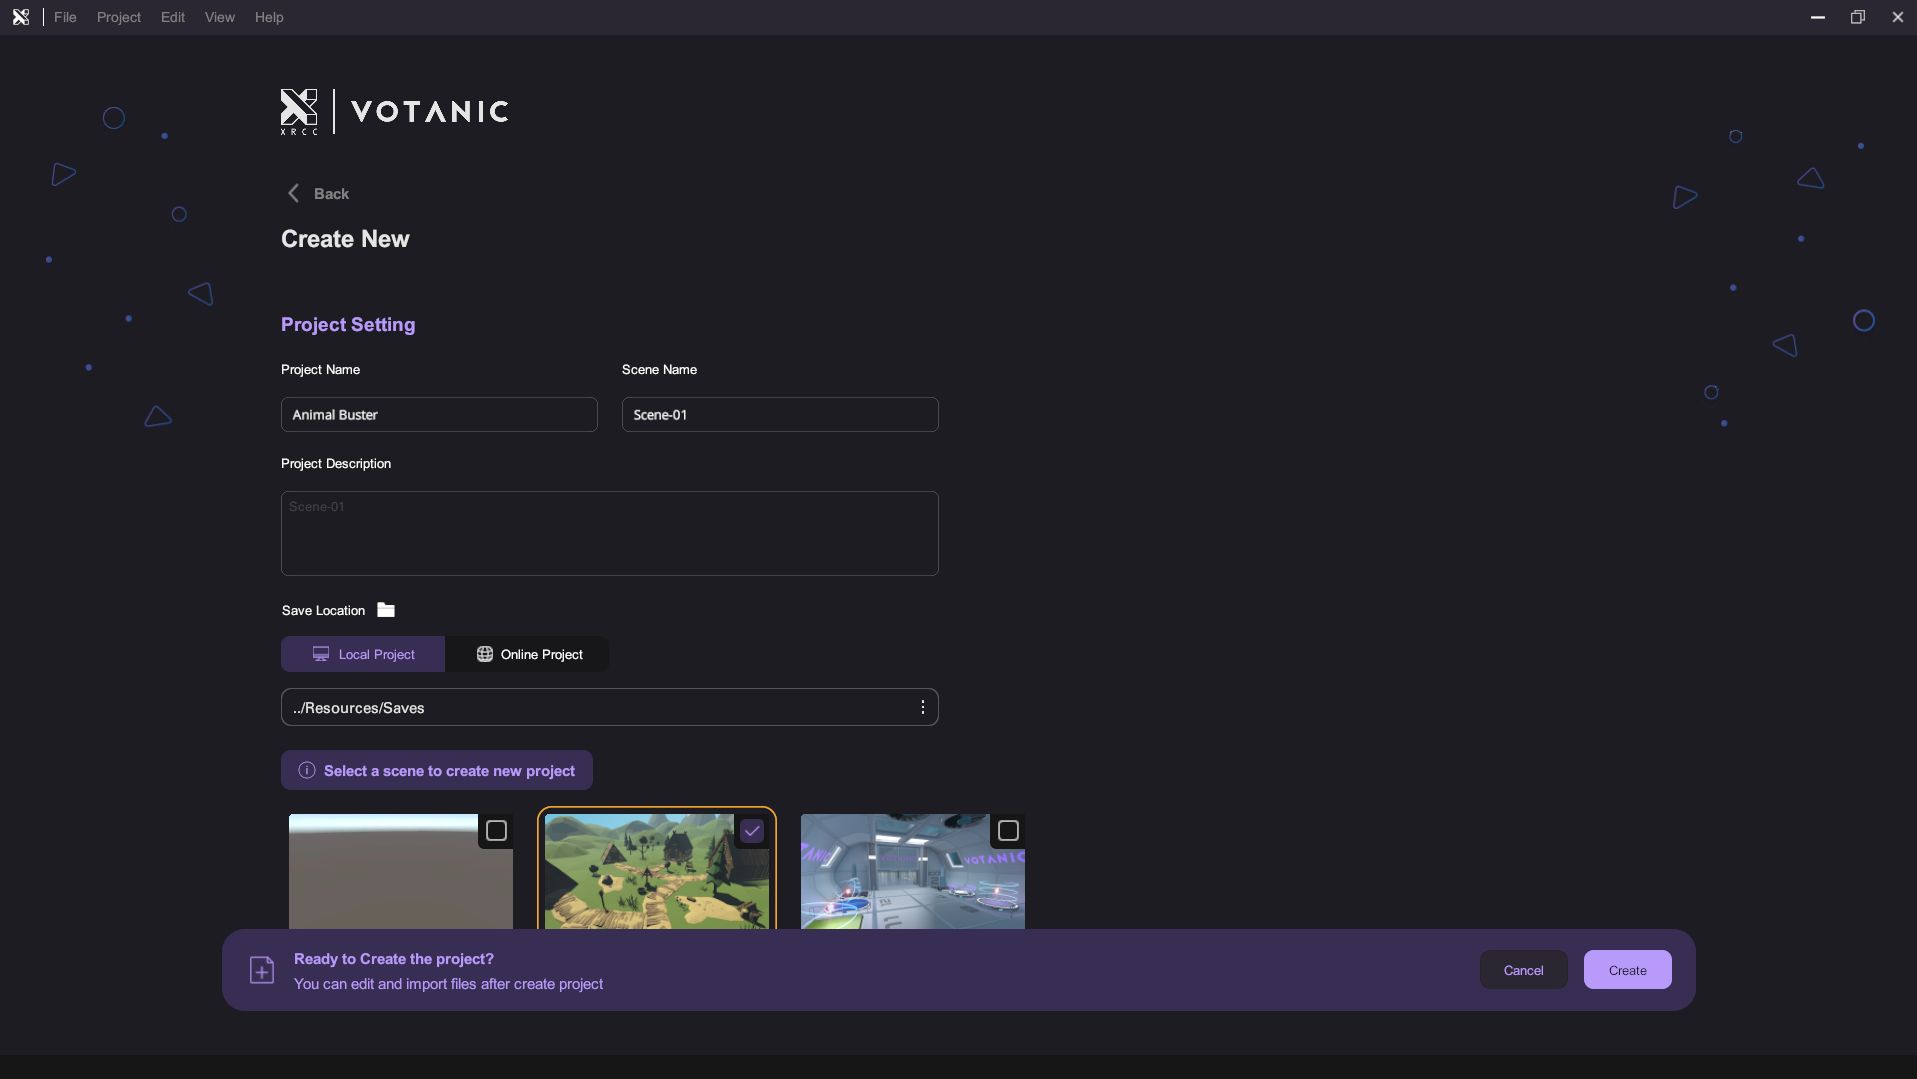
Step 0: Setup
- Create a project with a Cartoon Village scene.
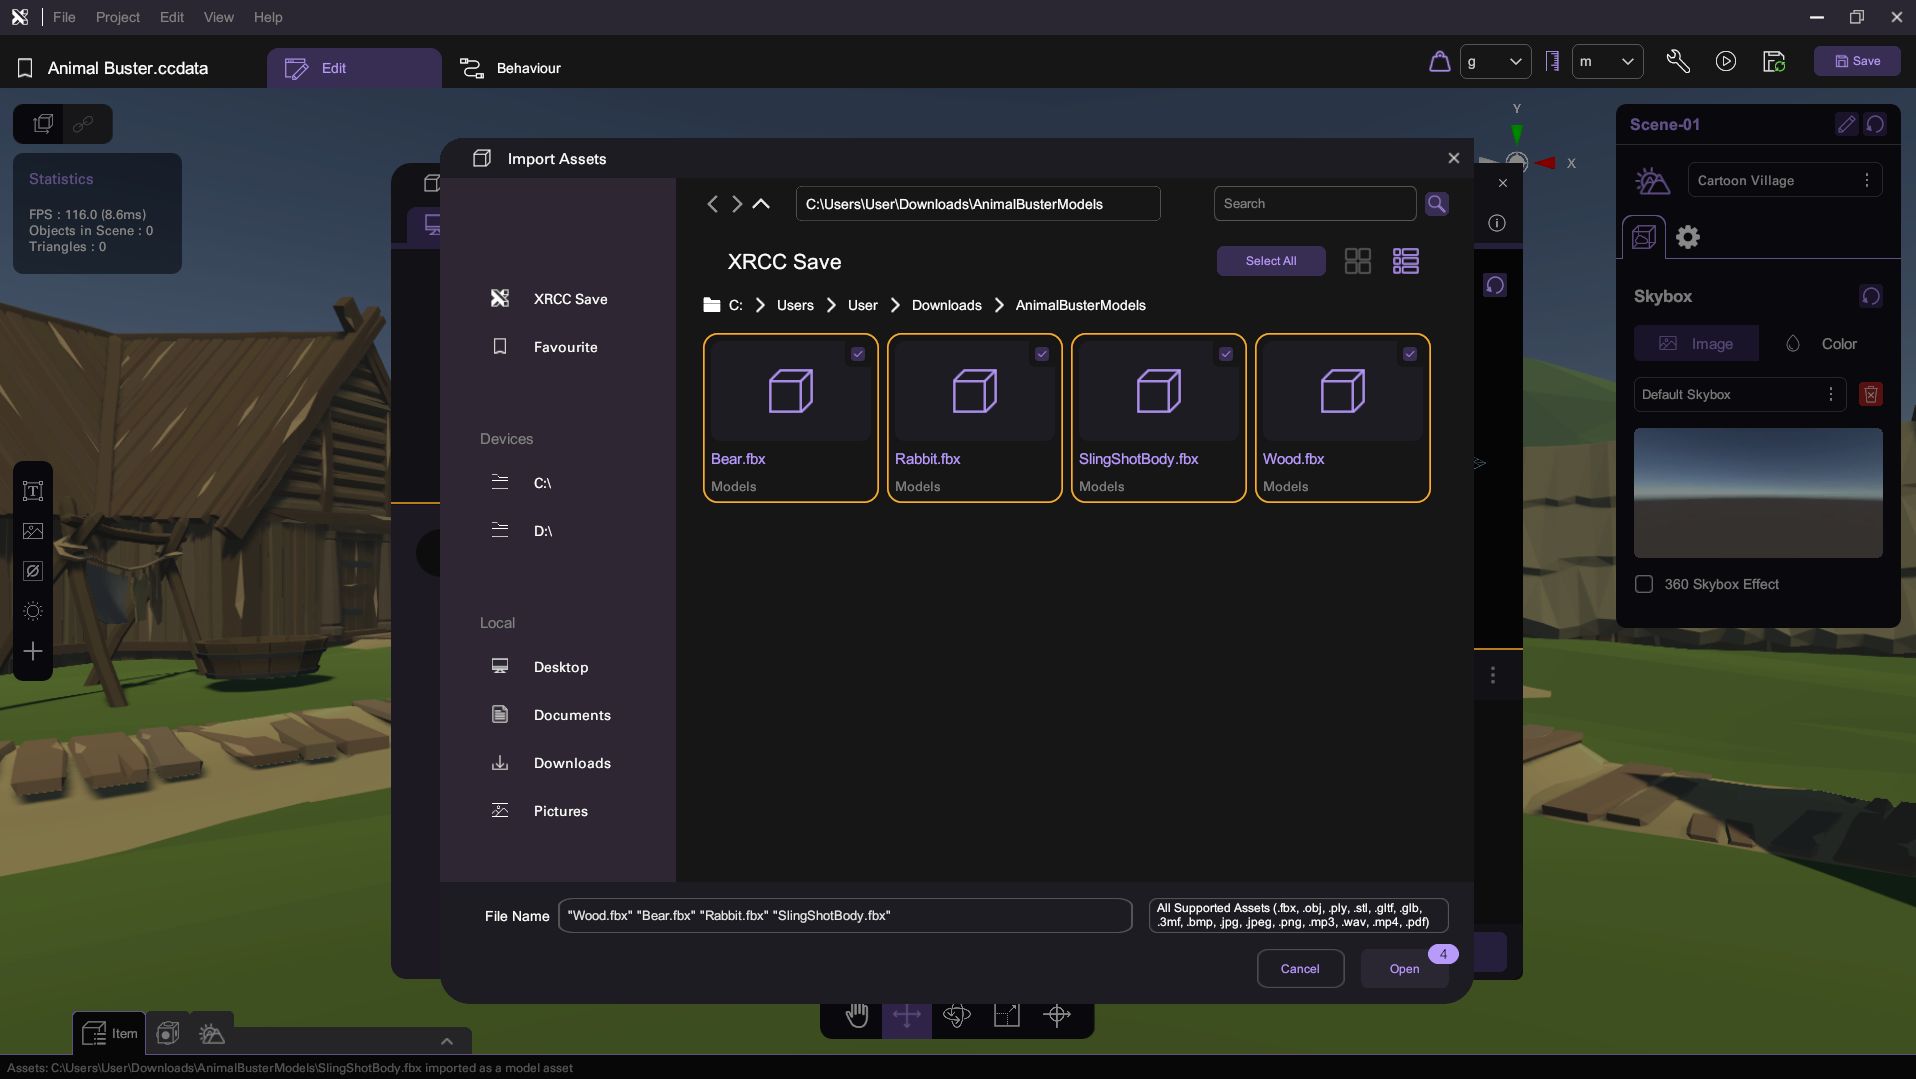
- Open the Asset Panel, click the Select File Button and import all the assets in our supported materials file.
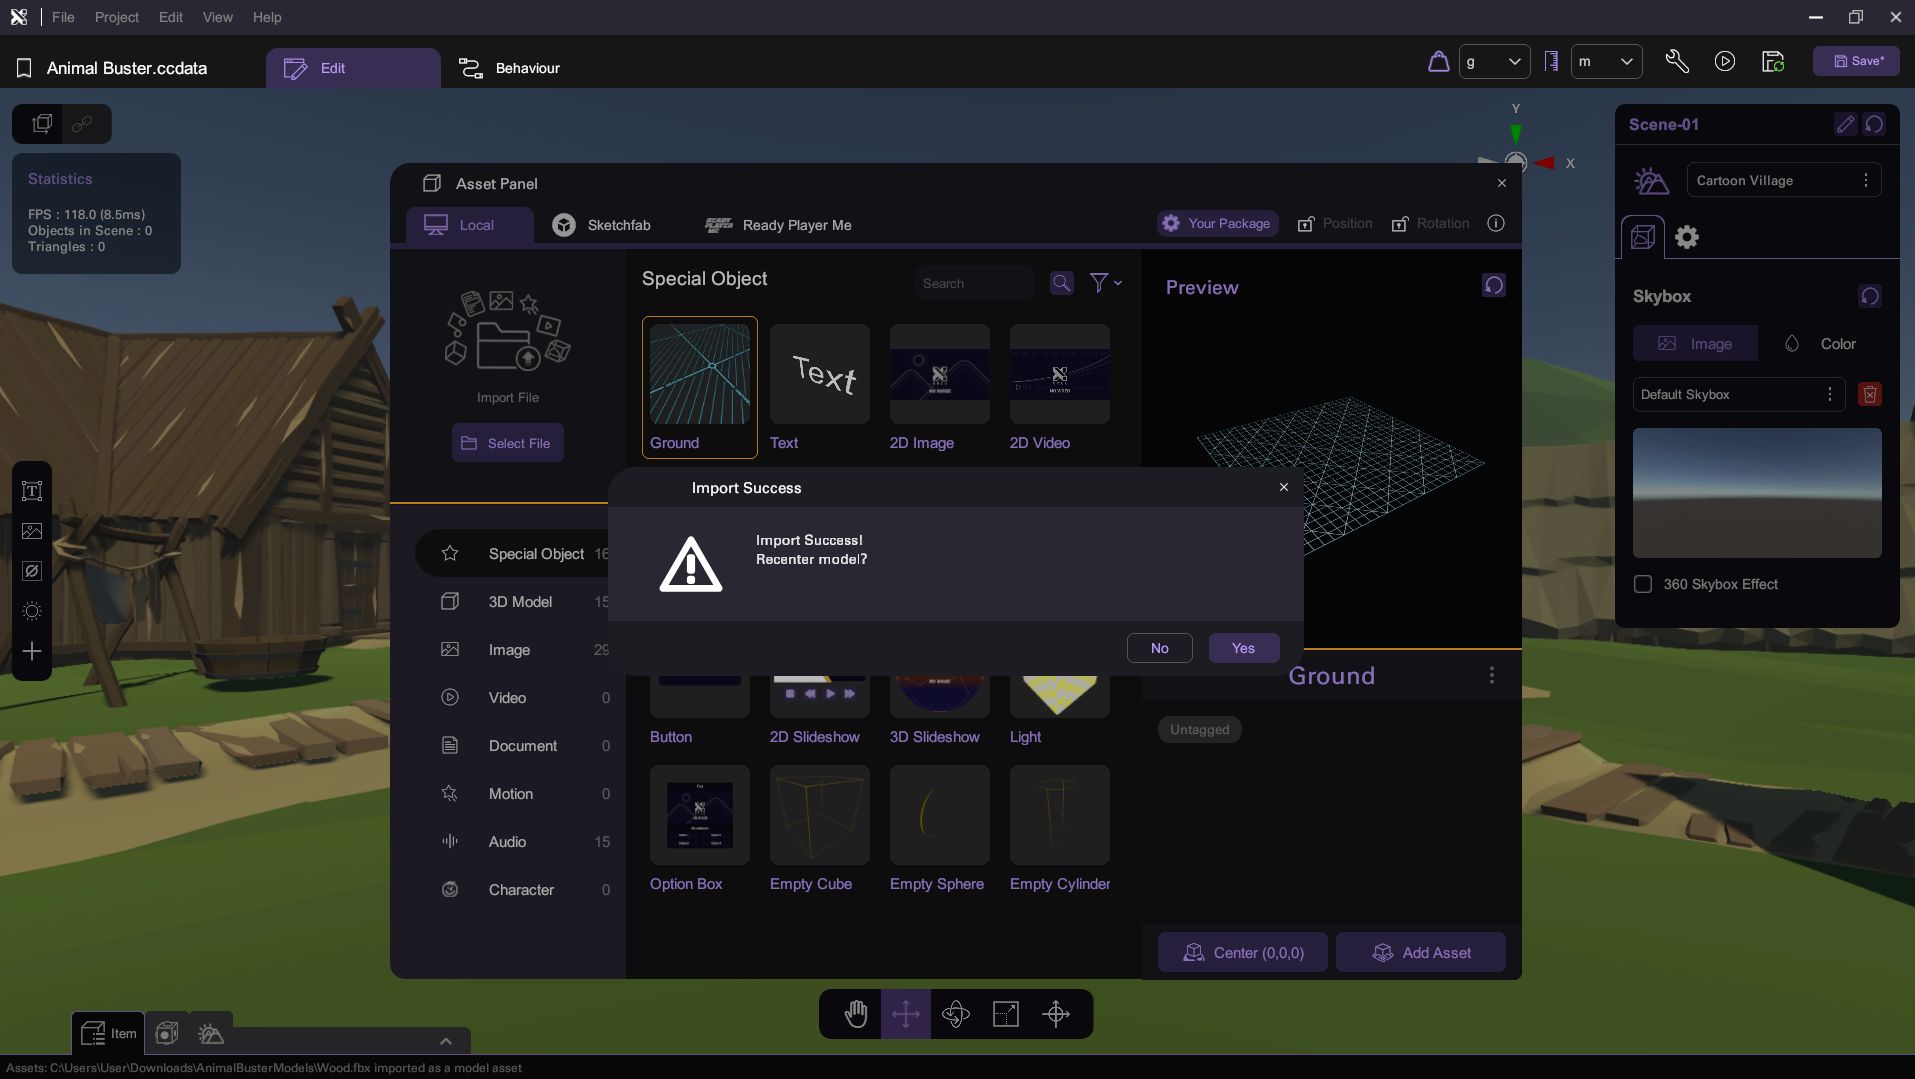
- After Import Success, click No, because we have already adjusted a good center to the model.
- There are 4 models in total.
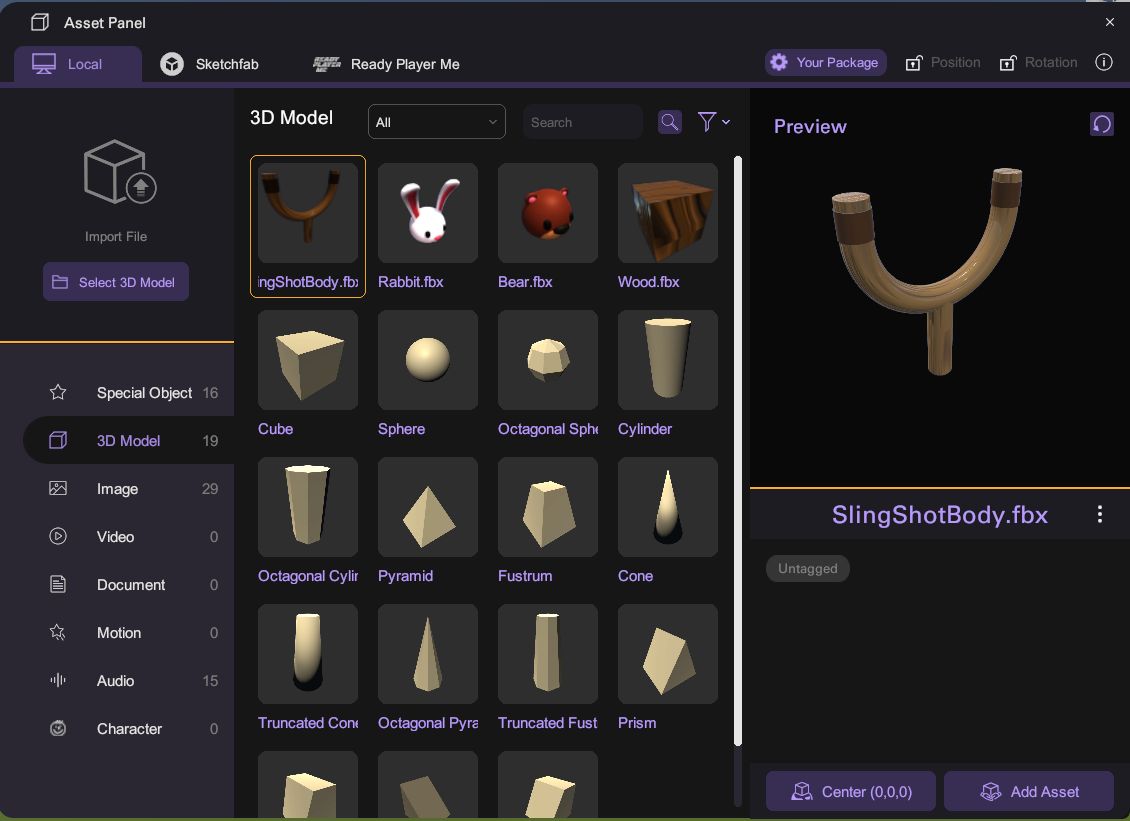
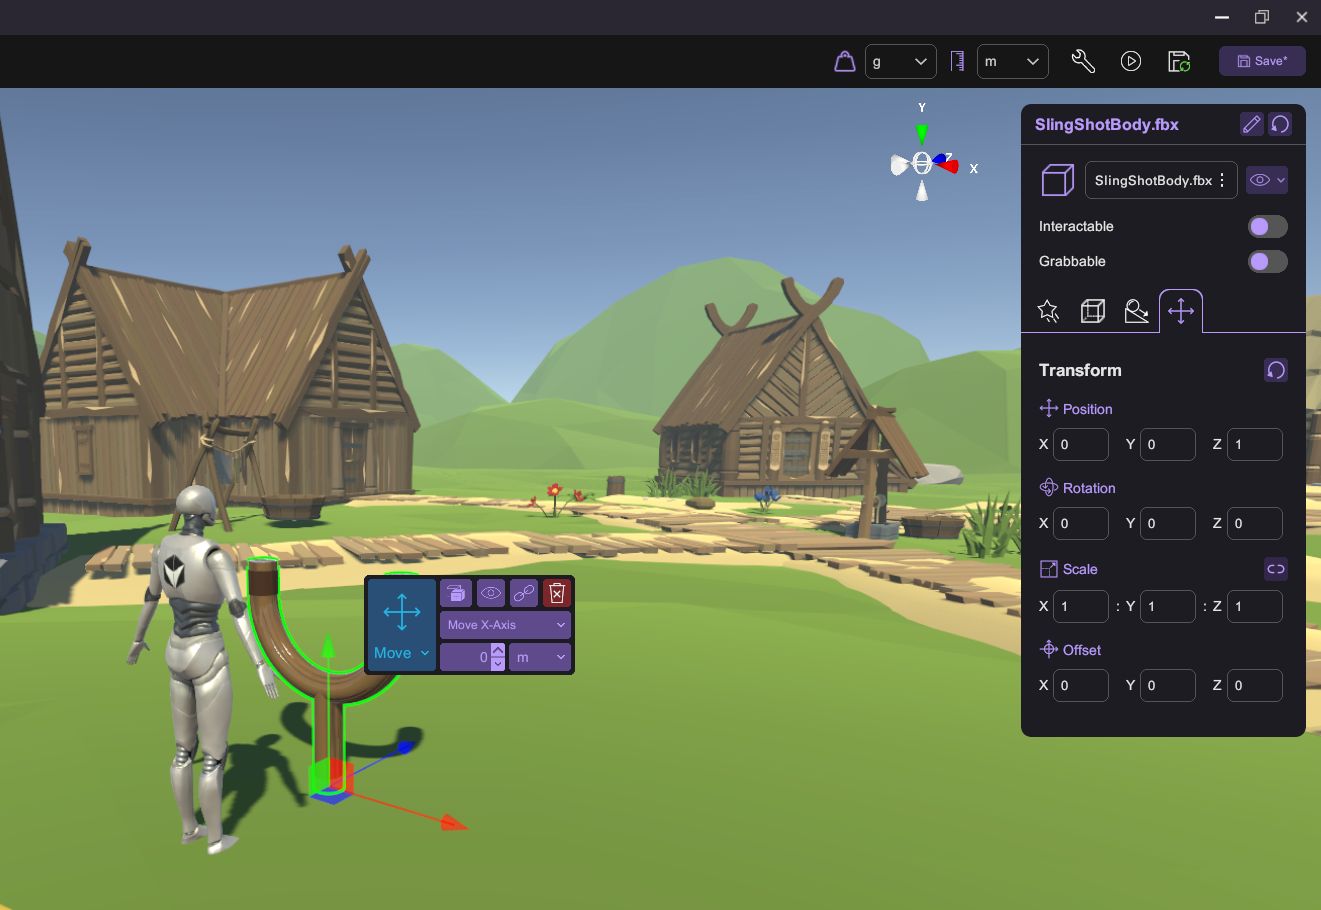
Step 1: Spawn the Slingshot Model
- Open the Asset Panel.
- Navigate to the 3D Model category.
- Find the Slingshot model and spawn it at the World Center.
- Ensure the unit is set to meters.
- Set the Slingshot model's Z-position to 1.
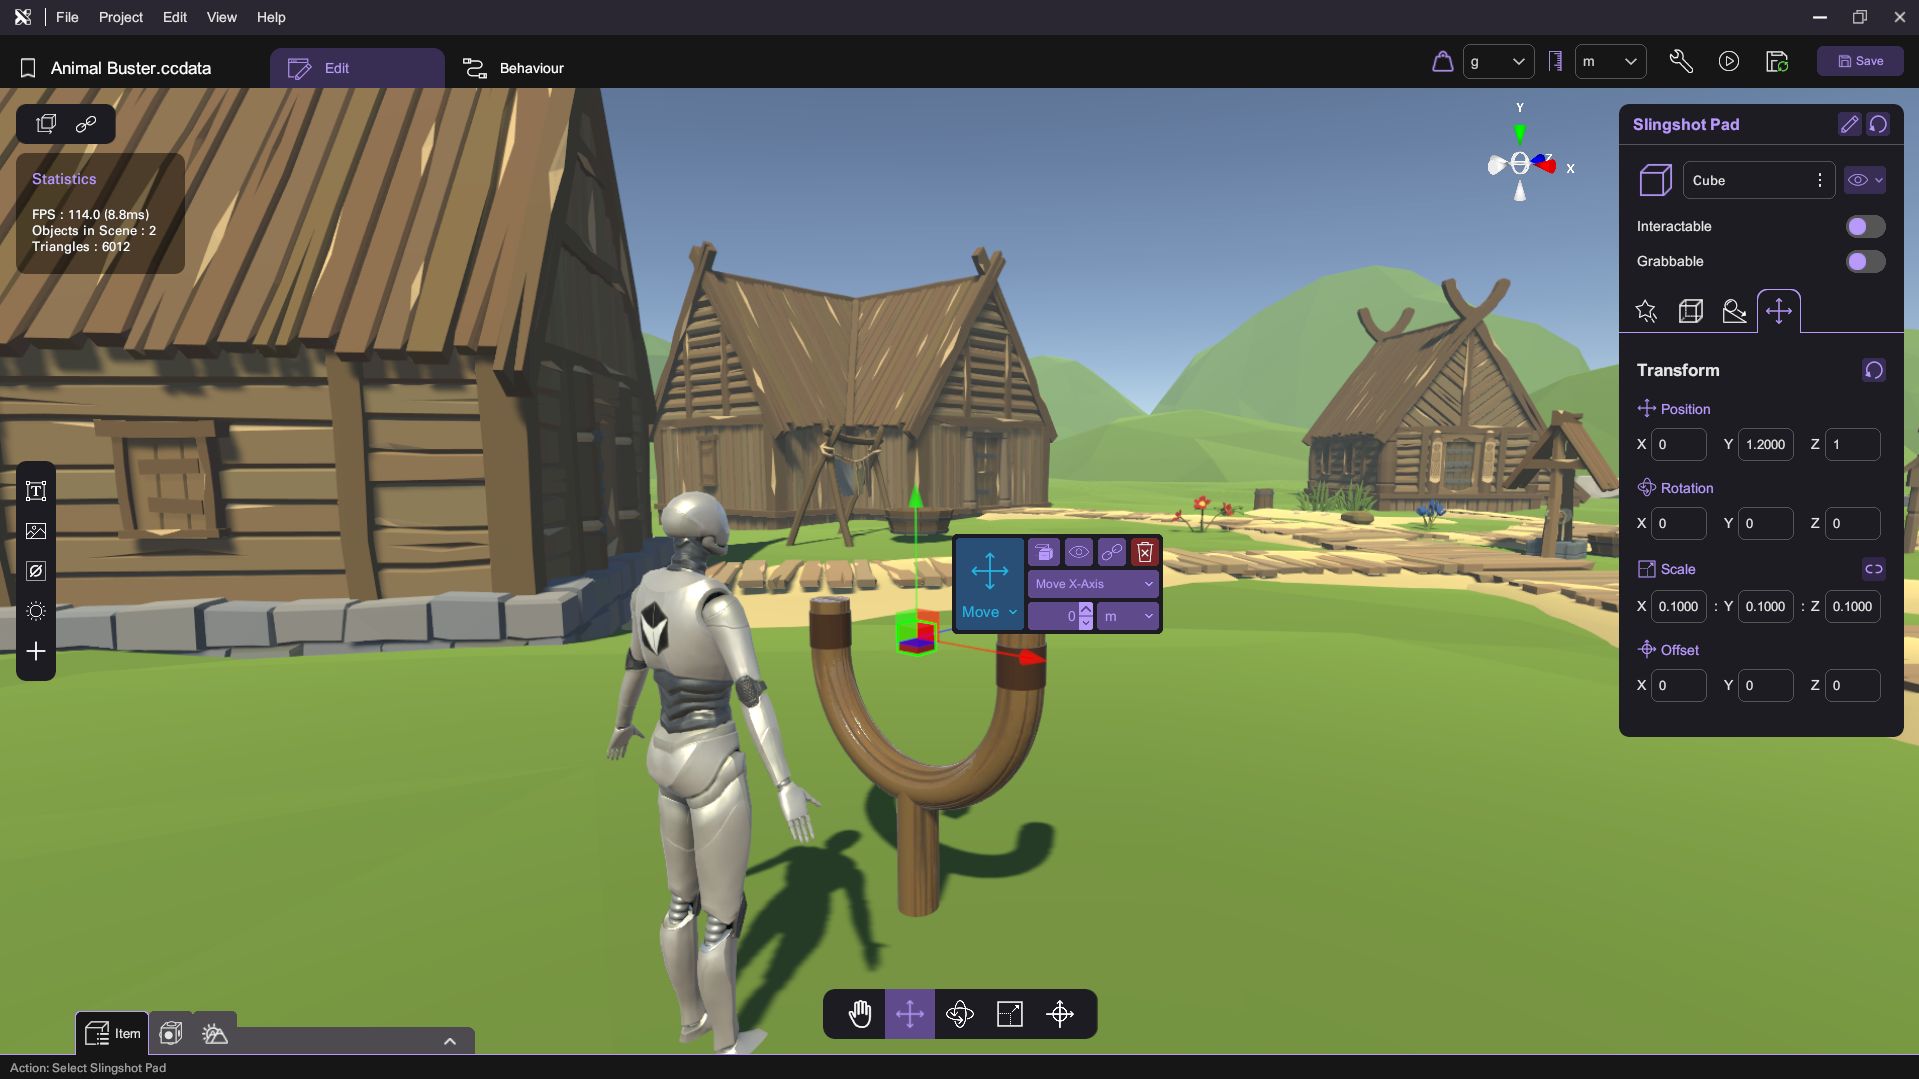
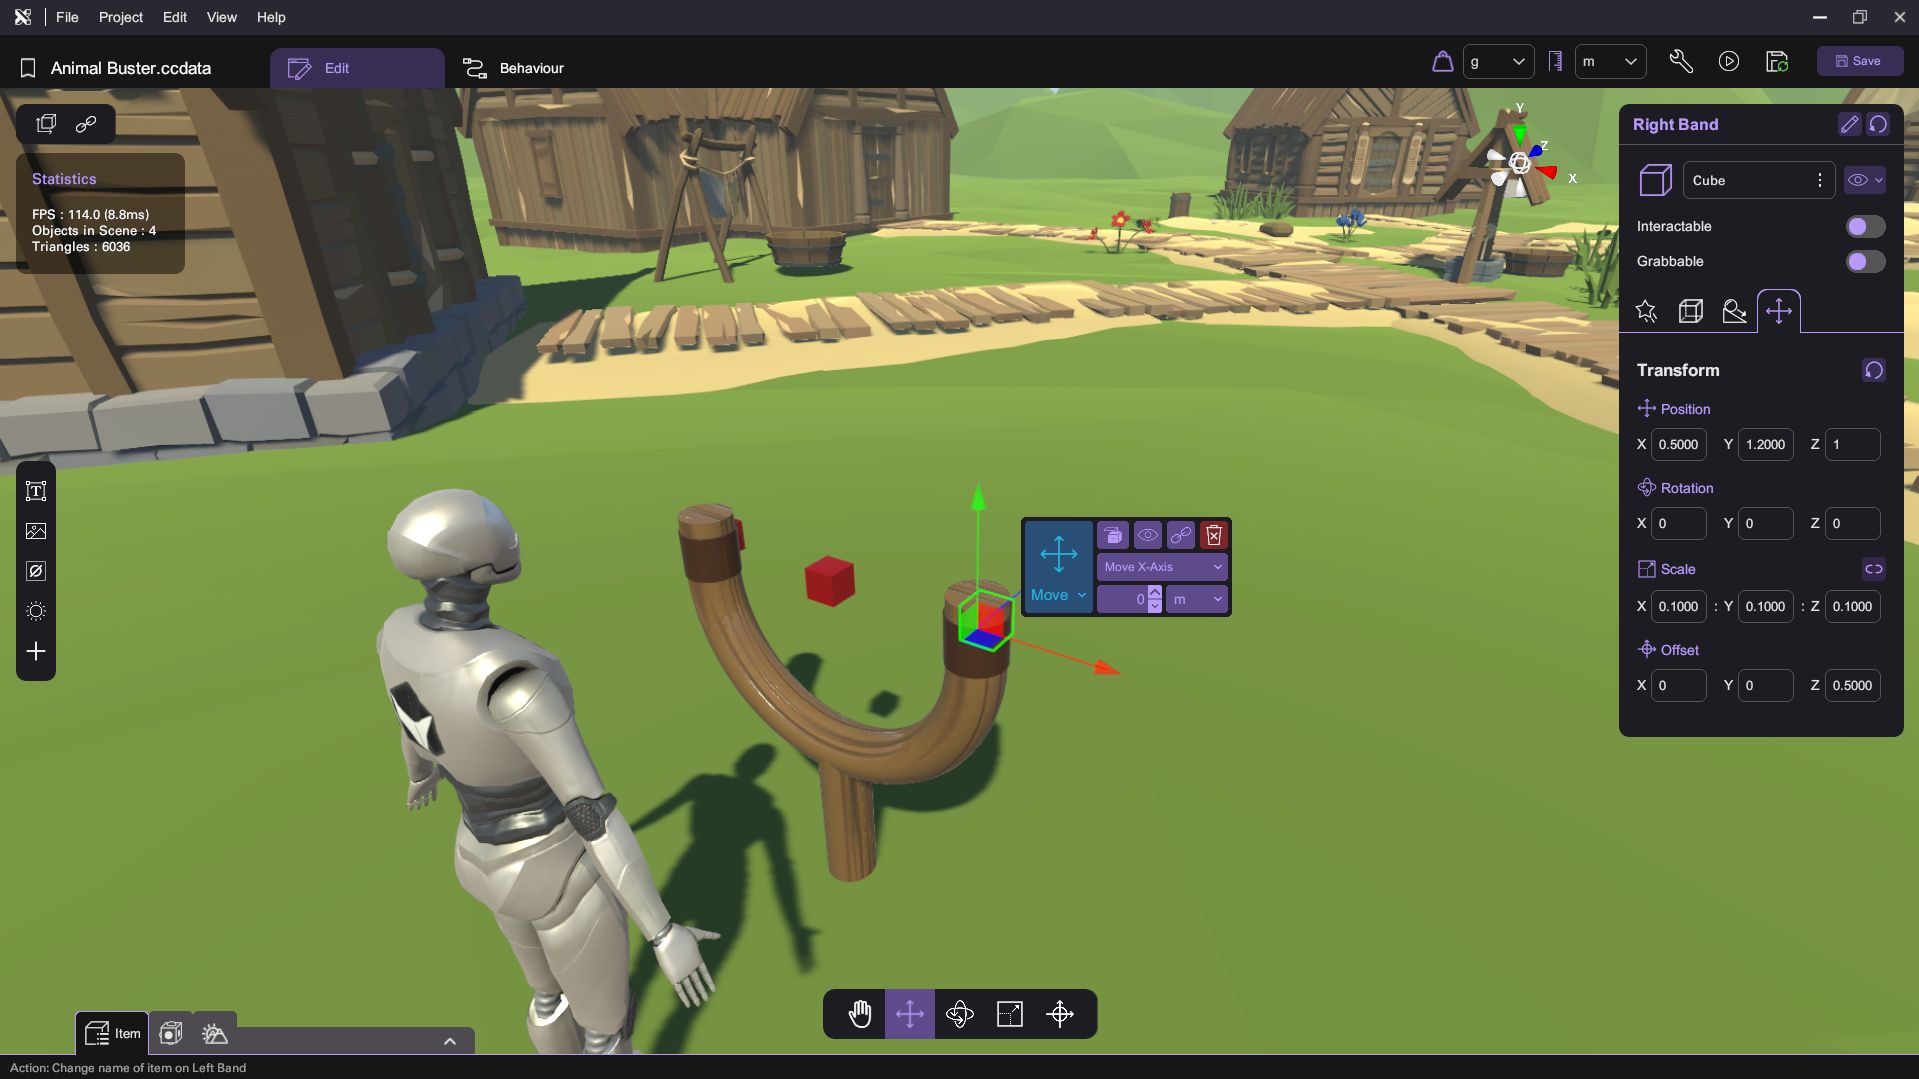
Step 2: Create the Slingshot Pad
- In the Asset Panel, spawn a cube at the World Center.
- Click the LockScale button and set the scale to 0.1, 0.1, 0.1.
- Set the position to 0, 1.2, 1.
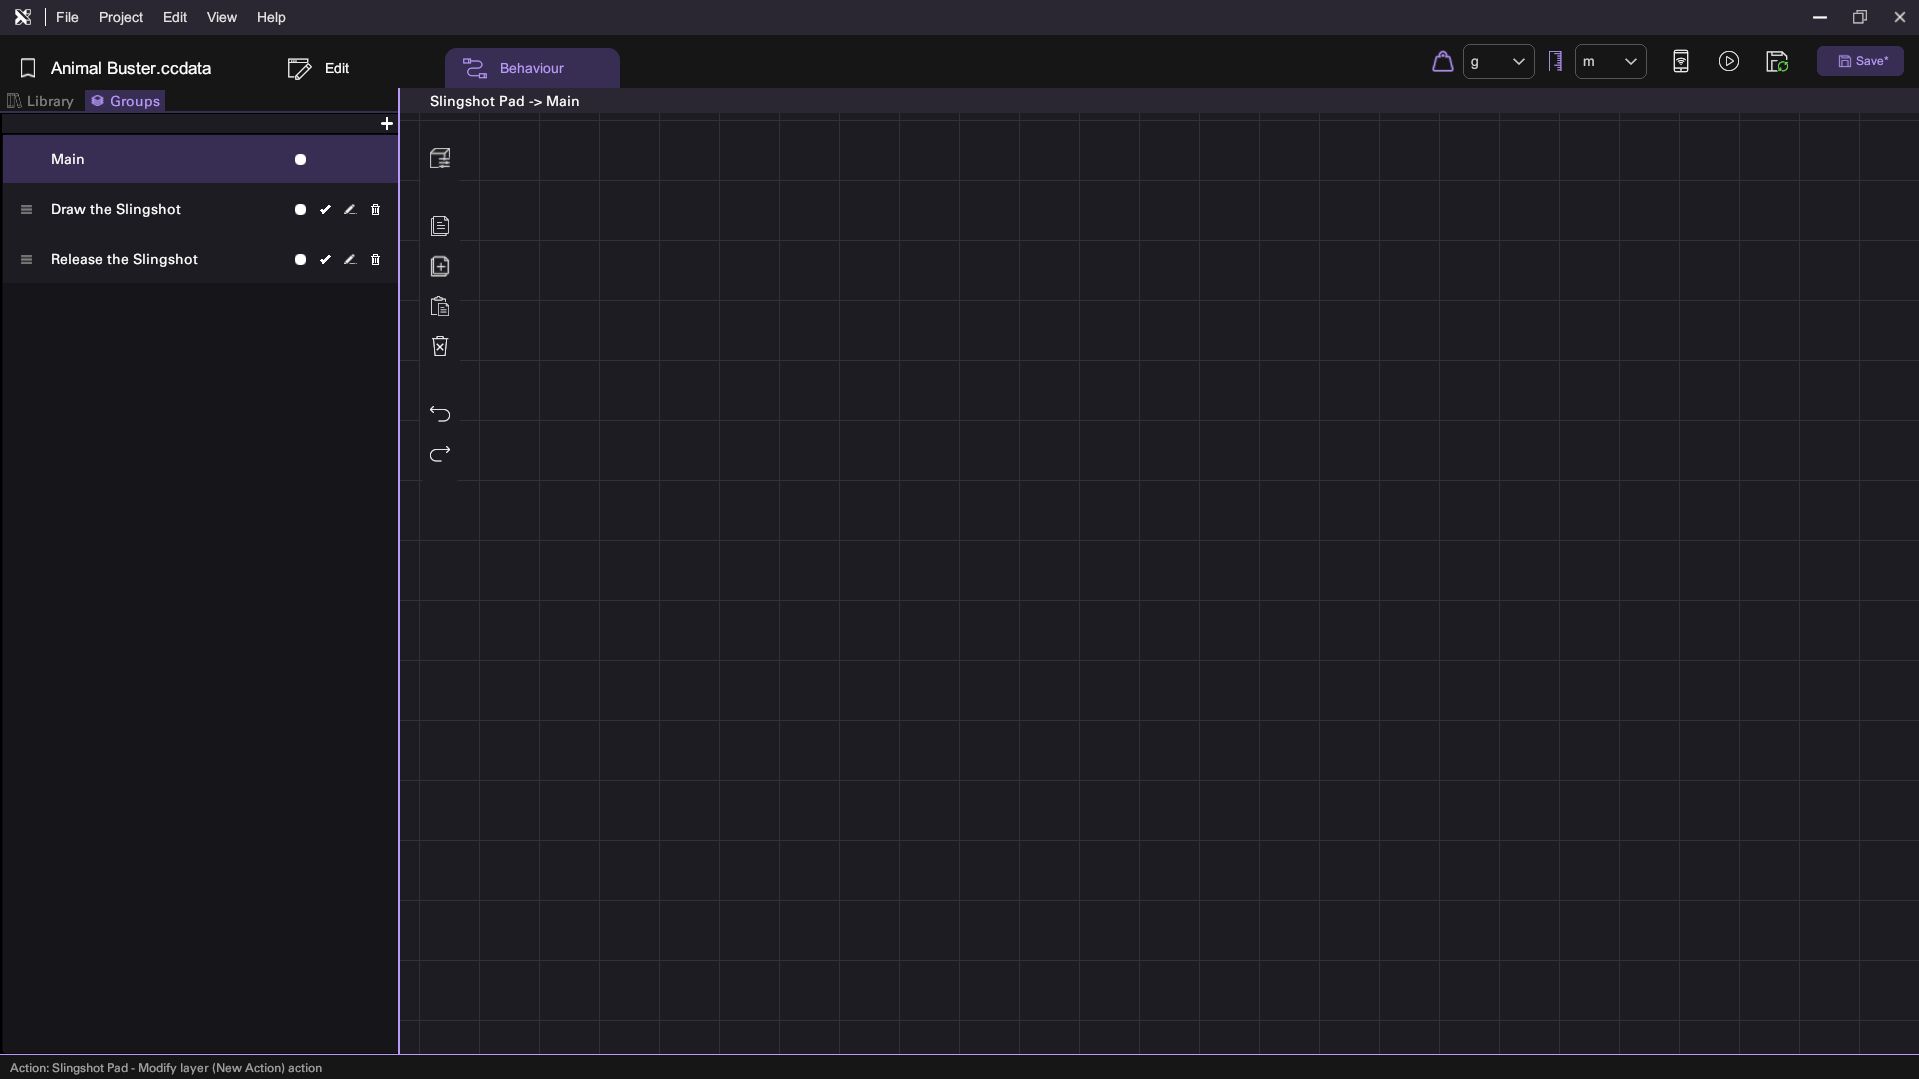
Step 3: Define Slingshot Actions
- Switch to the Behaviour tab.
- Click the Groups tab and create two new actions:
- Draw the Slingshot
- Release the Slingshot
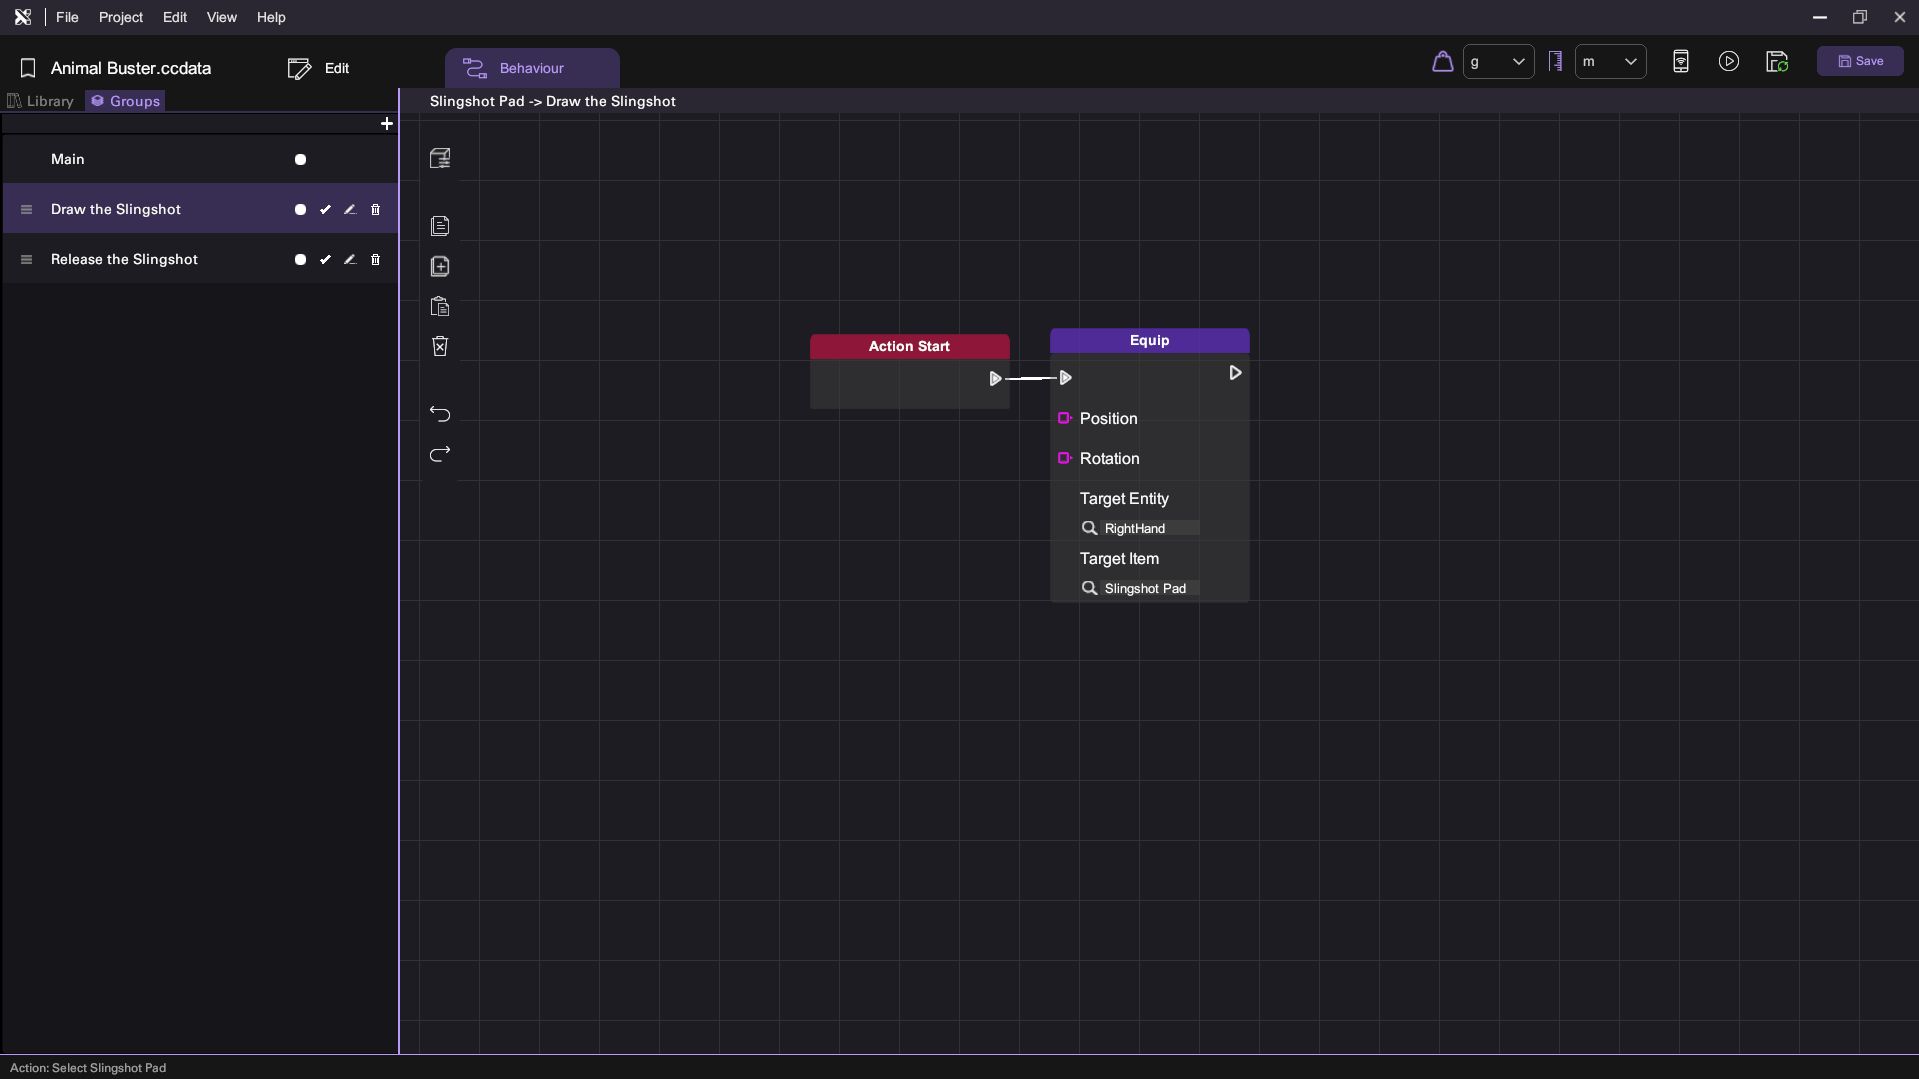
Step 4: Configure the Draw Action
- Select the Draw the Slingshot action.
- Drag the Equip block from the User section onto the canvas.
- Connect it to the Action Start node.
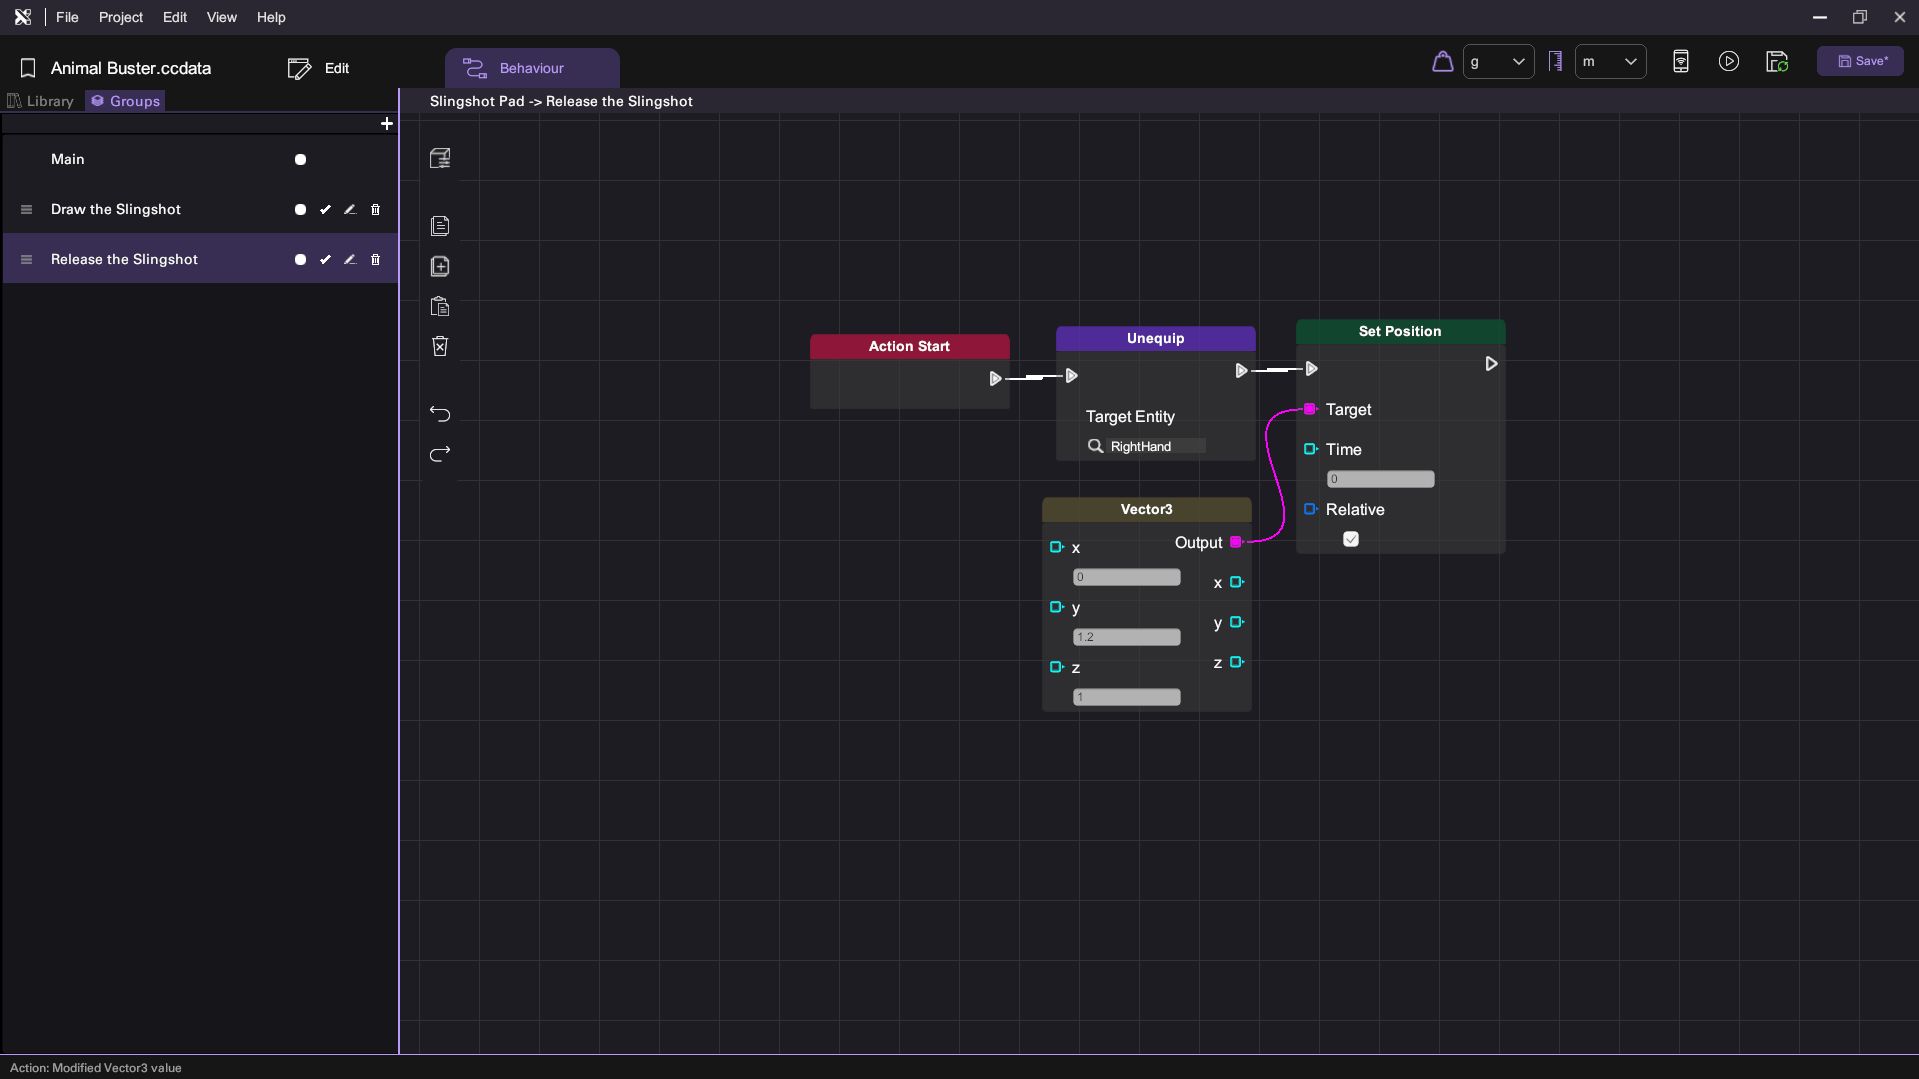
Step 5: Configure the Release Action
- Select the Release the Slingshot action.
- Drag the following nodes onto the canvas:
- Unequip node from the User section.
- Vector3 node from the Math section.
- Set Position node from the Motion section.
- Set the value of the Set Position node to 0, 1.2, 1. This resets the Slingshot to its default position upon release.
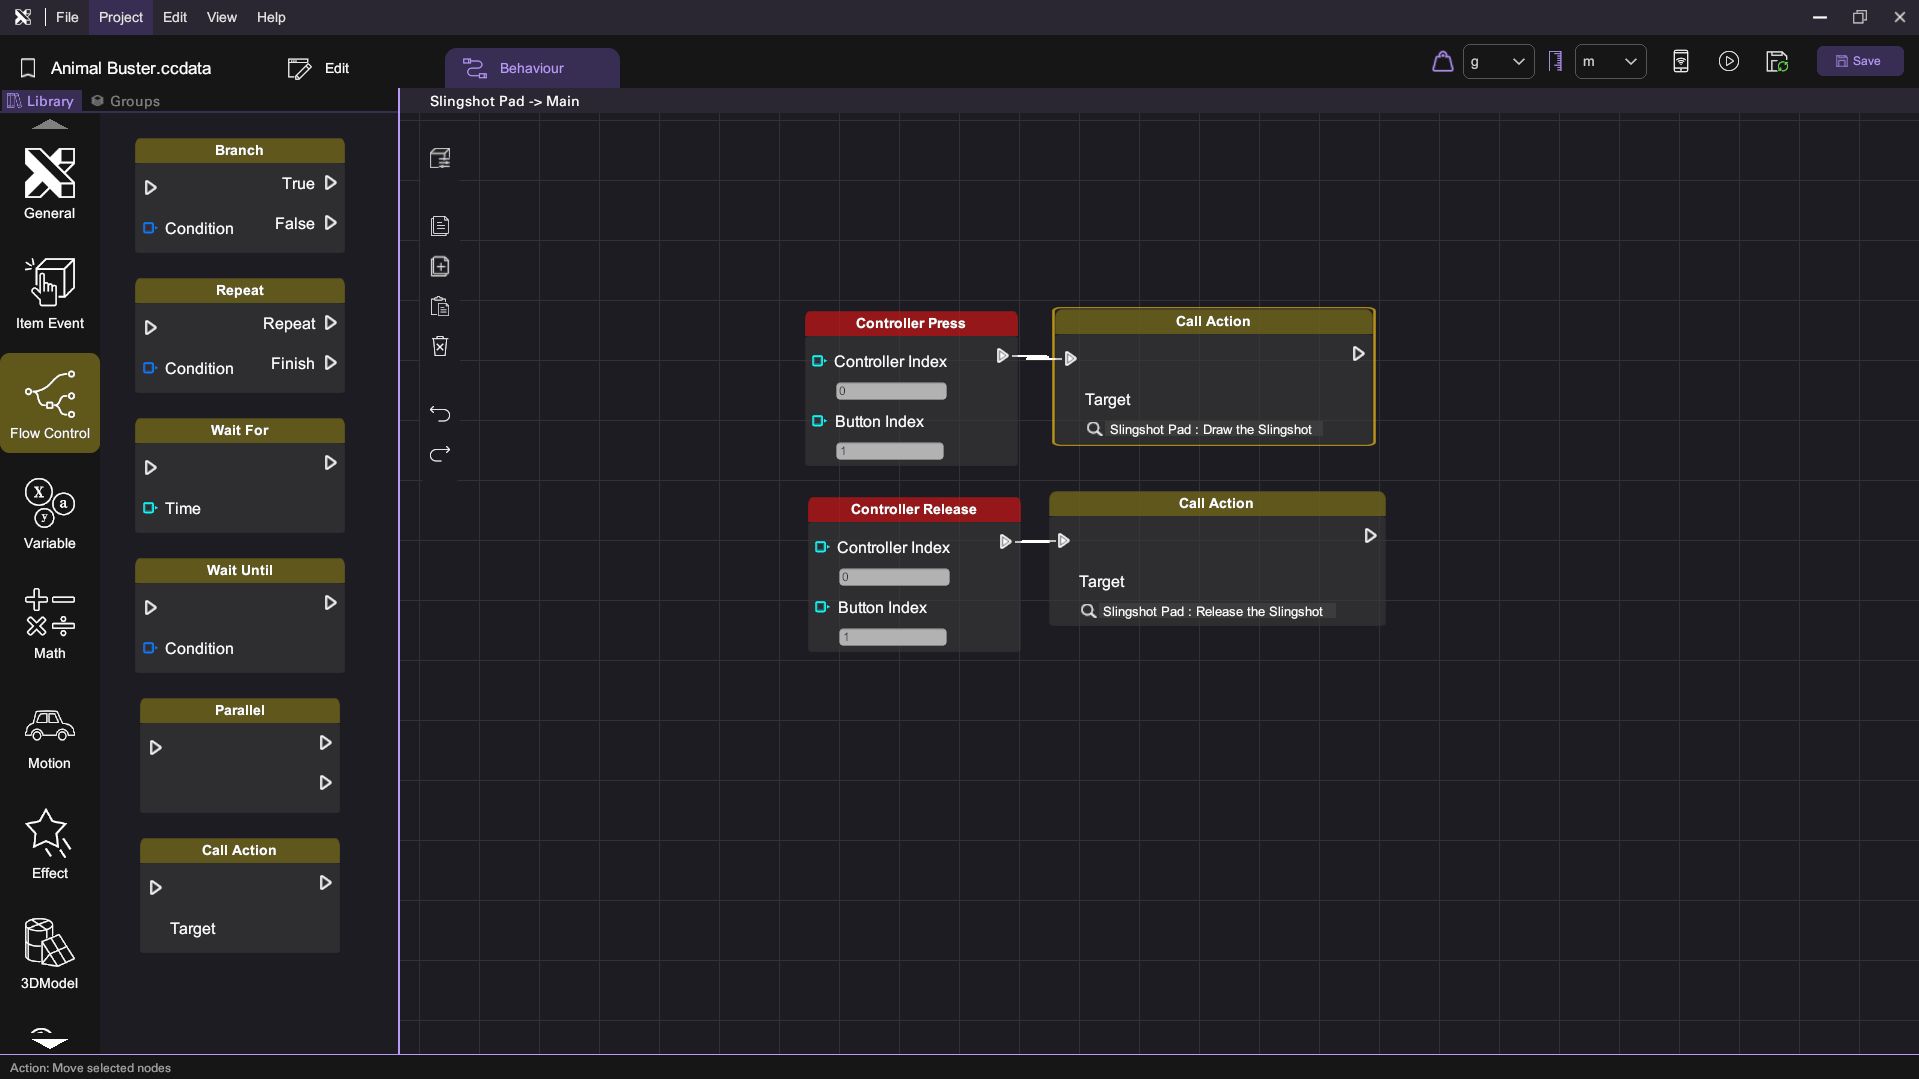
Step 6: Set Up Controller Input
- Switch to the Main behaviour page.
- Drag the Controller Press node and set the button index to 1 (right mouse button).
- Drag the Call Action node and set the action to Draw the Slingshot.
- Drag the Controller Release node and change the button index to 1.
- Drag another Call Action node and set the action to Release the Slingshot.
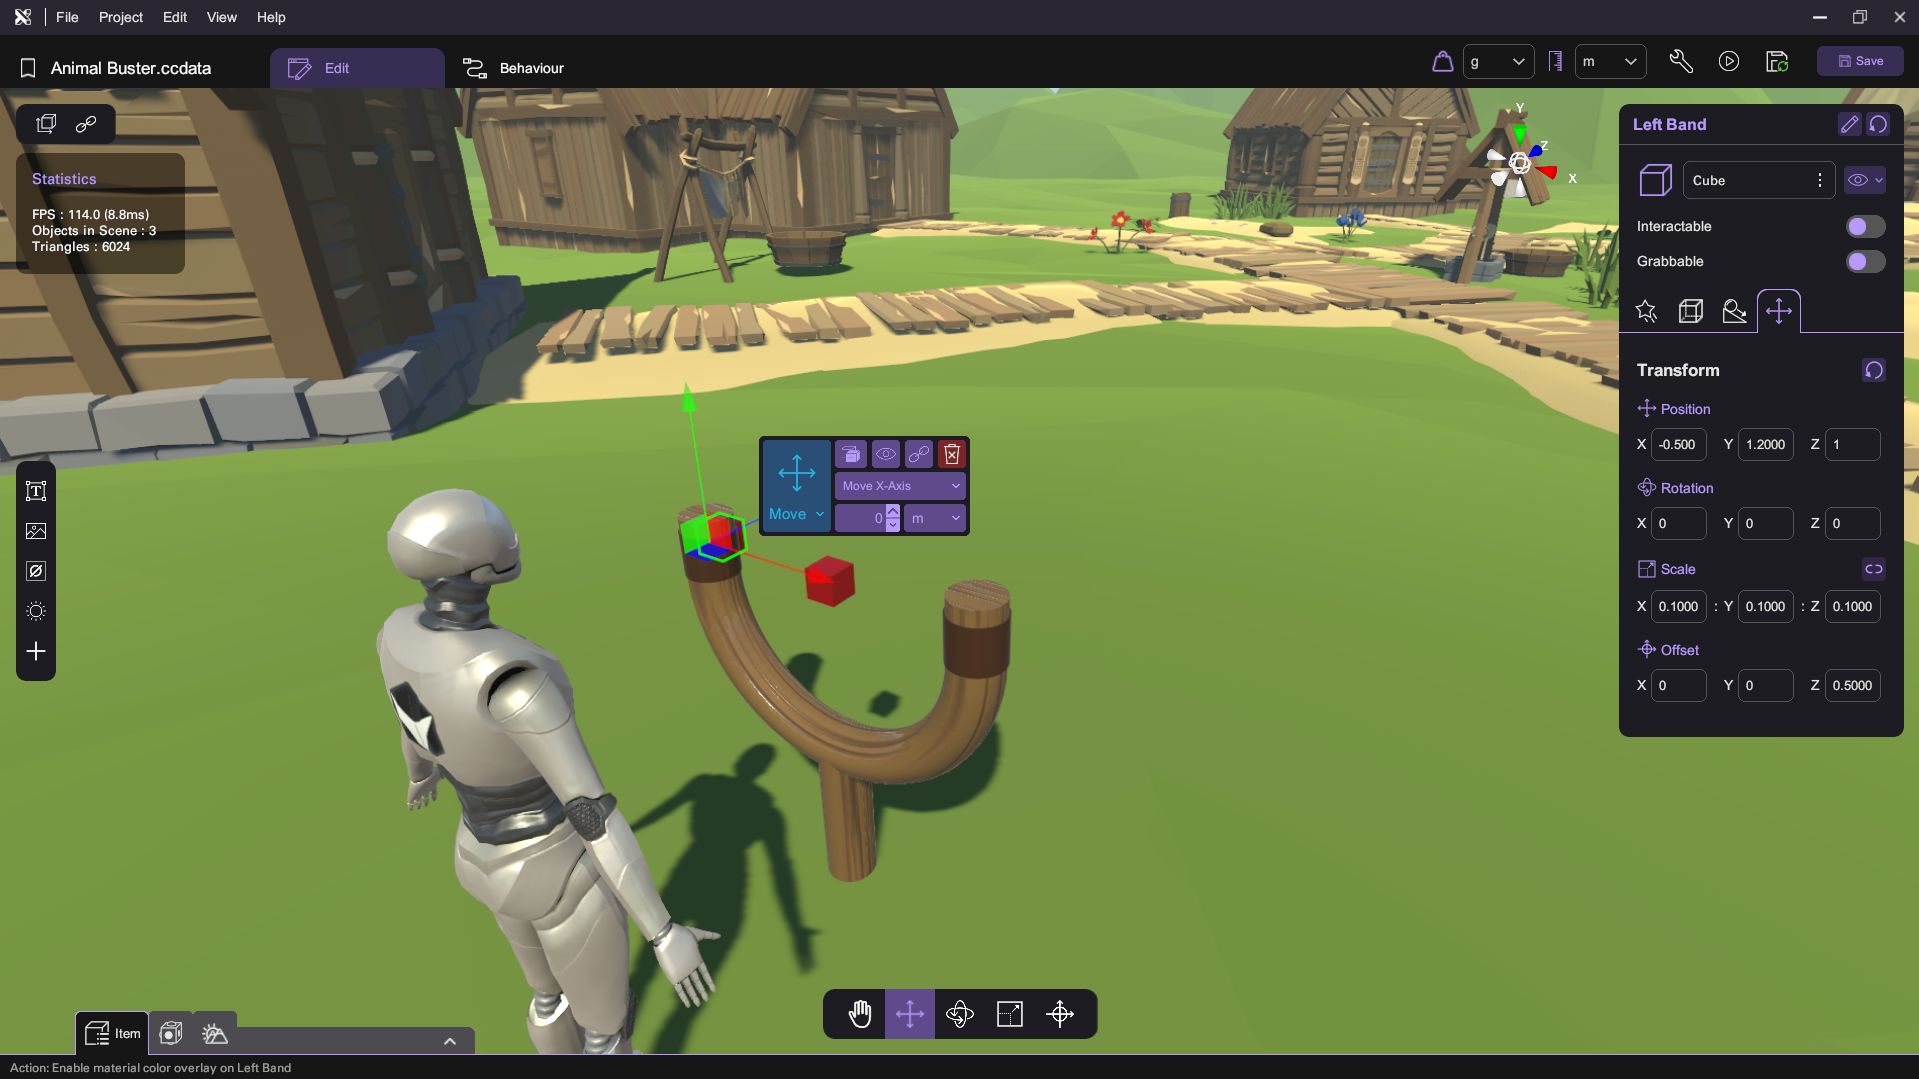
Step 7: Create the Left Band
- In the Asset Panel, spawn a cube at the World Center and rename it to Left Band.
- Open the LockScale button and set the scale to 0.1, 0.1, 0.1.
- Set the offset to 0, 0, 0.5 and position it to the left of the slingshot -0.5, 1.2, 1.
Step 8: Configure Left Band Behavior
- Switch to the Behaviour tab.
- Drag the Repeat node from the Flow Control section.
- Drag the Look At node from the Motion section.
- Drag the Get Position node from the Variable section and set the target to Slingshot Pad. Connect this to the Look At node's target.
- Close the Lock X, Y, and Z options to allow rotation.
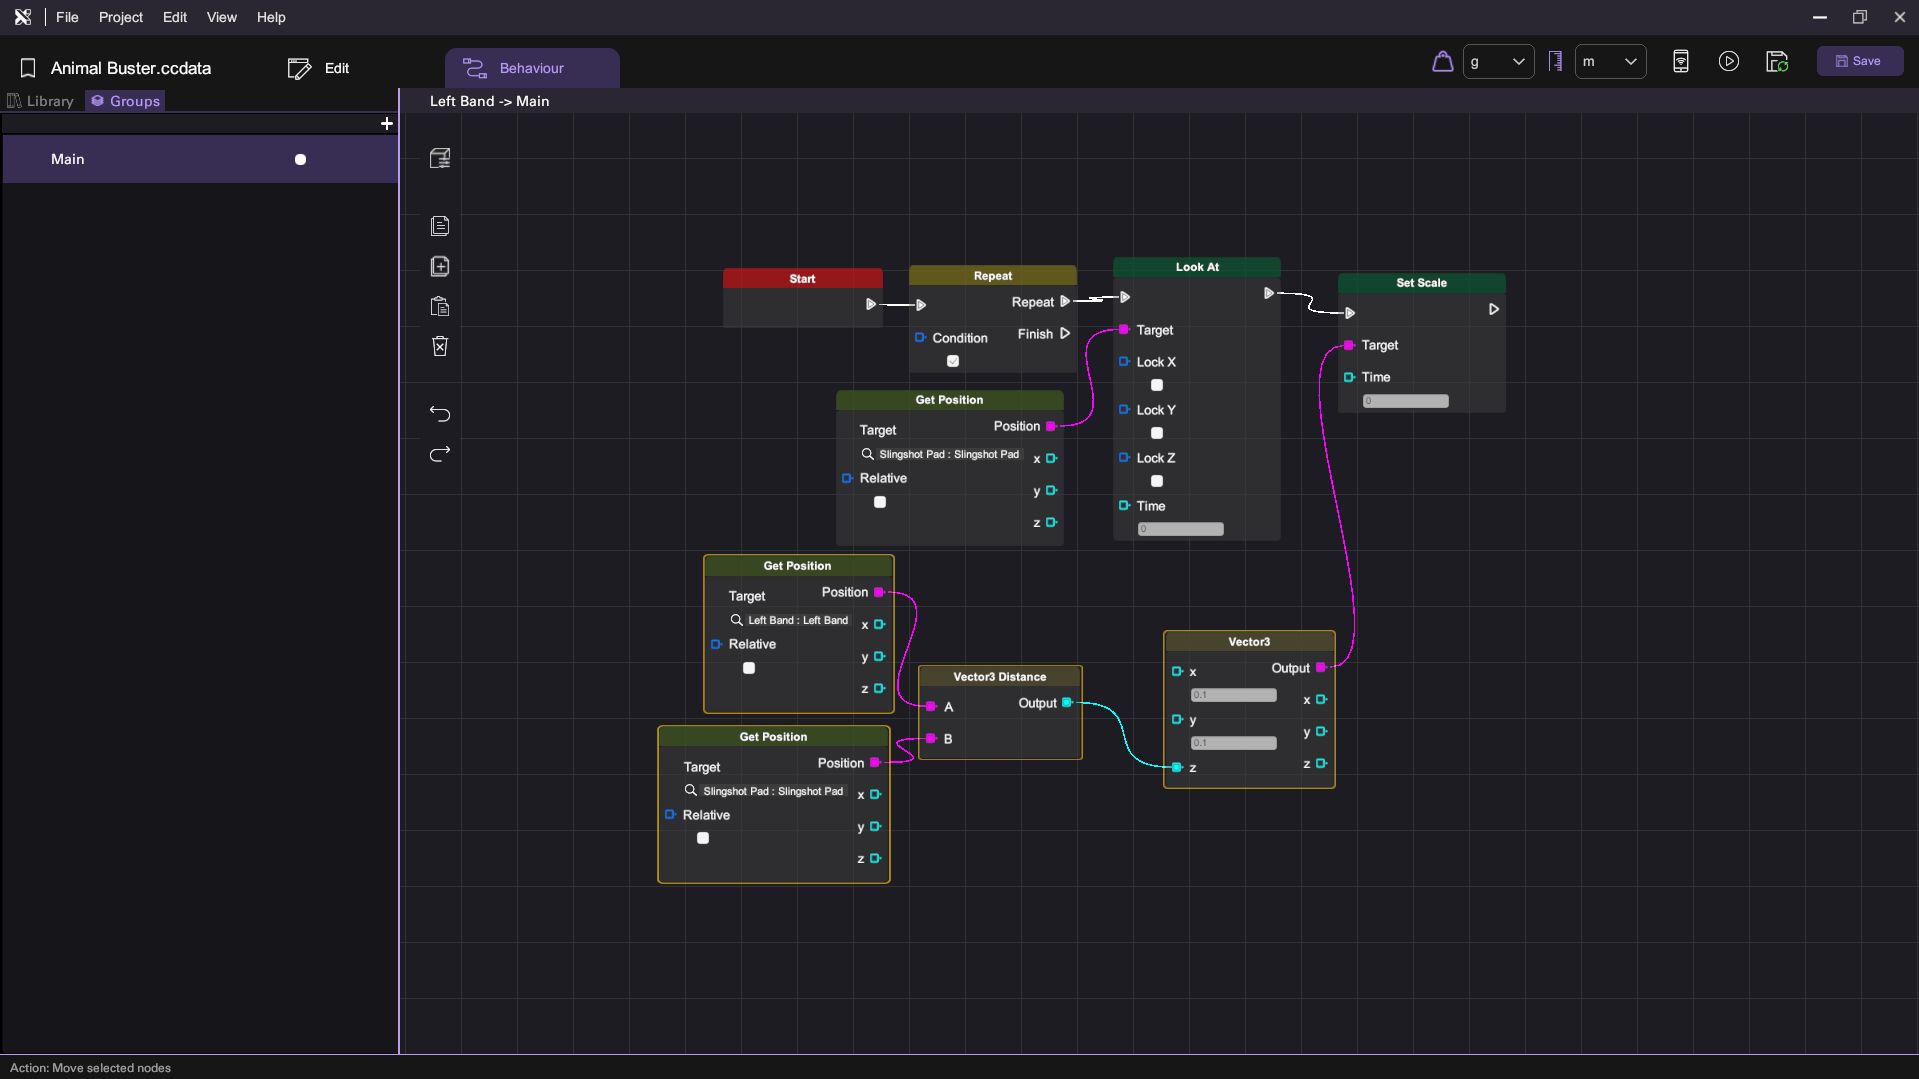
Step 9: Scale the Left Band
- Drag the Set Scale node from the Motion section.
- Use two Get Position nodes from the Variable section, targeting Left Band and Slingshot Pad.
- Close the Relative option to get their local position.
- Use the Vector3Distance node from the Math section to calculate the distance between the two positions.
- Drag a Vector3 node from the Math section and set the result to its Z value.
- Connect the output to the Set Scale node's target.
Step 10: Duplicate the Left Band
- Duplicate the Left Band and rename it to Right Band.
- Set its position to the right corner of the slingshot.
Congratulations! You've successfully created a functioning slingshot for the Animal Buster game.